
The prickly pear cactus, scientifically known as Opuntia ficus-indica, is a stunning and resilient plant that’s ideal for both indoor and outdoor gardening. With its striking paddle-like segments and edible qualities, it’s a favorite among plant lovers. This guide will walk you through the entire process of growing your own prickly pear at home — from preparation to harvest.
Step 1: Understand Your Plant
Before diving into the planting process, it’s essential to learn about the nature of the prickly pear cactus.
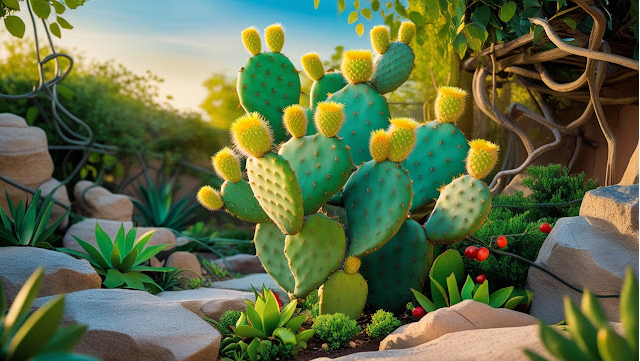
This cactus features flat, rounded pads covered with fine spines called glochids.
It thrives in desert-like climates, needing abundant sunlight and dry air to flourish.
In spring, it produces vibrant yellow flowers followed by sweet, edible fruit.
The pads (also known as nopales) are not only visually appealing but also nutritious and used in various culinary dishes.
Step 2: Choose the Ideal Location
Where you place your cactus can make or break its growth.
For outdoor planting, choose a location that gets ample direct sunlight throughout the majority of the day.”
Indoors: A bright window, especially one facing west or south, is perfect.
Avoid humid or poorly lit spaces, which may lead to mold or slow growth.
Step 3: Select the Right Pot and Soil
Using suitable containers and soil is crucial for the plant’s health.
Container: Use a pot with drainage holes to prevent water from pooling.
Soil: Either buy a cactus-specific mix or create your own blend:
Regular potting soil
Coarse sand or crushed gravel
Perlite or pumice to improve airflow
This blend closely resembles the fast-draining, sandy soil found in the cactus’s native habitat.”
Step 4: Propagate Using a Pad
Prickly pear propagation is simple, especially when starting from a mature pad.
Instructions:
Use sterilized scissors and wear gloves to cut a healthy pad.
“Set the cut pad in a shaded area and leave it undisturbed for 5 to 7 days, allowing a firm callus to develop.”
Plant the dried end into soil, about 2 inches deep.
Delay watering until the soil is completely dry to the touch.”
“This drying period is essential to prevent rot and promote healthy root formation.
Step 5: Follow a Smart Watering Routine
One of the most common mistakes is overwatering.
During warm months, water sparingly every 2–3 weeks.
Always check that the topsoil is completely dry before the next watering.
During the colder months, water only once every 4 to 6 weeks.”
Pro tip: Underwatering is far less harmful than overwatering for succulents.
Step 6: Apply Fertilizer When Needed
Although they require minimal care, prickly pears do benefit from occasional fertilizing.”
Use a cactus-specific, low-nitrogen fertilizer once monthly from spring to early fall.
Refrain from applying fertilizer during the plant’s dormant phase in late autumn and winter.”
Steer clear of high-nitrogen formulas to prevent weak, overgrown pads.
Step 7: Maintain the Ideal Environment
The cactus prefers hot, dry environments and does not tolerate frost well.
Optimal temperature: Between 70°F and 100°F (21°C–38°C).
Keep away from drafty windows, heavy rain, or freezing temperatures.
If your climate gets cold, bring potted plants inside during winter months.
Humidity should be low — dry air helps mimic desert conditions.
Step 8: Identify and Solve Common Issues
Despite being hardy, prickly pear cacti can encounter a few problems.
Mealybugs: Appear as fuzzy white clumps.
Scale insects: Look like small brown or gray bumps on pads.
Fungal infections: Caused by poor ventilation or excess moisture.
Solutions:
Dab pests with a cotton swab dipped in rubbing alcohol.
Use natural insecticides such as neem oil if infestations persist.
Keep the area around the cactus dry and well-ventilated.
Step 9: Harvest the Pads and Fruits
With time and care, your cactus will produce edible parts you can enjoy.
The best time to harvest pads (nopales) is in spring, when they are still soft and immature.”
Use gloves and a sharp knife to remove them cleanly from the base.
Fruits (Tunas): Harvest in late summer when they turn a deep red or purple.
Always peel carefully — the small spines can cause skin irritation.
Both pads and fruits can be consumed raw or cooked and offer several health benefits.
Step 10: Winter Protection Tips
If you live in a cooler region or experience seasonal changes:
Move potted plants indoors to a bright, dry location.
Cut back on watering and stop fertilizing during the cold months.
For garden-grown plants, use a breathable frost cover or move them to shelter when temperatures drop below freezing.
Final Thoughts
Growing a prickly pear cactus at home is both easy and rewarding. With minimal care, it provides not only ornamental value but also tasty, nutritious pads and fruits. By following these steps — from propagation to winter care — you’ll ensure